Archive | Renovation RSS feed for this section

Fense Sense

13 Oct

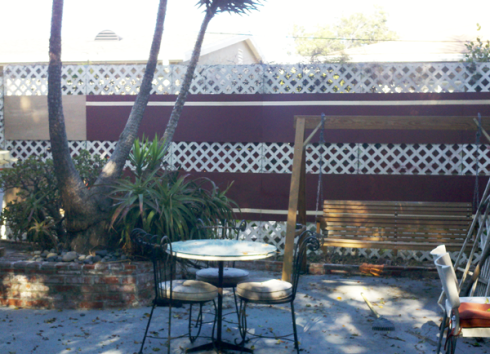
Welcome to landscaping craft day!  I wanted to spruce up my courtyard a bit and give myself some privacy from the neighbors.  Right now, the only thing between myself and them is a gnarly bush and some white lattice fencing – not very effective or pleasing to the eye!

fencebefore

The first thing to do was rip down that scraggly bush and start with a clean slate!

fenceafterplantremoval

It’s lookin’ better already 😀  I didn’t have the manpower to put up a whole new fence, so I decided to just accessorize the lattice with some basic 2’x3′ wooden boards bought at the local hardware store.

blankboards

I put darker boards on each end to give the wood some contrast.  Here is a close-up so you can see the difference in color.

boardsCU

Now, it’s time to decorate!  I wanted to make two horizontal stripes with tape so that once I painted over the stripes and peeled the tape away, there would be perfect, natural wood stripes running across my backyard.

This project called for one of my favorite all-purpose materials: duct tape!  It was a two-person job to run the duct tape across each board and measure every few feet to make sure it was still the same distance from the edge of the board.

melstriping

measuring

I did one stripe about 4 inches down from the top edge of the top boards and one stripe 4 inches up from the bottom edge of the bottom board.  Already the stripes looked pretty cool!

tapestripes

Next it was time for painting!  I got out my roller and tray and rolled one solid coat of burgundy red over the whole thing.

paintingstripes

Once the paint was thoroughly dried, I slowly peeled off the duct tape to reveal the beautiful wood underneath!

peelingtape

Peeling off the tape was definitely my favorite part, so satisfactory!  The final product really jazzed up the backyard and reminded me of a sweet, vintage surfboard; perfect since I live right by the beach 😀

finishedstripes

finishedstripes2

stripesCU

This was a simple and quick afternoon project that left my yard looking very cool…and there is sill lot of blank space on that wood for some super sweet mural action…

Garage Reno – Craigslist Warrior Edition

13 Sep

Today I would like to share a rather large-scale craft: a garage renovation I did in my own home!  I consider this to be a craft because I made almost everything myself and on a literally non-existent budget.  Really had to get the creative juices flowing here!  The garage is HUGE, it is really like two garages connected.  I only wanted to renovate one side of the garage which meant I had to put up a wall.  Here are some pretty scary before photos – look at that red paint!

The gap in the wall being hidden by a file cabinet

Drywall for patching up le gap

Kind of like a dungeon...

This garage needed everything.  In addition to a wall it needed paint, furniture and just some general TLC!  The thing that made this reno especially interesting was that I had NO money to spend on it.  I decided to take advantage of free Craigslist and see if I could really get enough supplies for a full scale renovation.  Free Craigslist often advertises leftover paint in various amounts and colors.  I spent about a month driving around the city collecting about 20 partially full cans of paint and then I laid them all out and tried to figure out how to mix them all together in order to make enough paint to cover the walls and create colors that would go well together.  This is the color combo I came up with:

After I gave the room a color make-over, I had to figure out how to furnish it!  I had a pre-existing table that I painted brown to use as a desk and for the rest I turned to Free Craigslist.  I got some great vintage fabric that I used to make curtains and I went with a generally minimalist decor.  I think the end result was really great – much homier than the dingy garage I started with!

I painted the floor the coral pink color in order to mask the cement. I was even able to find some cement sealant on free Craigslist to help keep the paint from chipping.

The painted door is my favorite part!

It’s still not the lap of luxury, but for a garage and a shoe-string budget I think it turned out just fine!  Enjoy 🙂